Getting Started
Install CatDV Server fields and panels
Instead of creating each field manually, you can use a Node.js script with the CatDV npm package to automatically generate all the required Amazon AI fields.
1. Install Node.js
Download Node.js from the official site: https://nodejs.org/en/download
Follow the following articles for installation of NodeJS on your OS:
Windows: https://www.geeksforgeeks.org/installation-of-node-js-onwindows/
MacOS: https://twm.me/best-practice-for-installing-node-js-for-developerson-mac-os
2. Download CatDV Import/Export Tools
Download the CatDV Import & Export tools and extract it: http://support.squarebox.com/downloads/import_export_tools.zip
Extract the ZIP file.
3. Install the CatDV npm package
You will have to install the CatDV npm package: https://www.npmjs.com/package/catdv
Navigate into the extracted folder in your terminal and run:
npm install catdv
4. Import Amazon AI Fields and Panels
Inside the folder, locate the import_settings.js script.
Run the following command to import Amazon AI fields and panels into your CatDV server:
node .\import_settings.js -url http://localhost:8080 -user Administrator -pwd PASSWORD <path_to_plugin_folder>/panelset-amazonAI-v3.txt
Replace the URL, username/password, and file path as needed for your environment.
5. Verify in CatDV
Log in to CatDV Server and go to: Admin Pages → Customisation Tab → Fields
You should now see two new field groups:
Amazon AI
Amazon AI Connector Fields

Also, in the CatDV Admin Pages under the Customisation tab → Panels, you will see a new panel set named 'amazonAI' added to your CatDV Server.
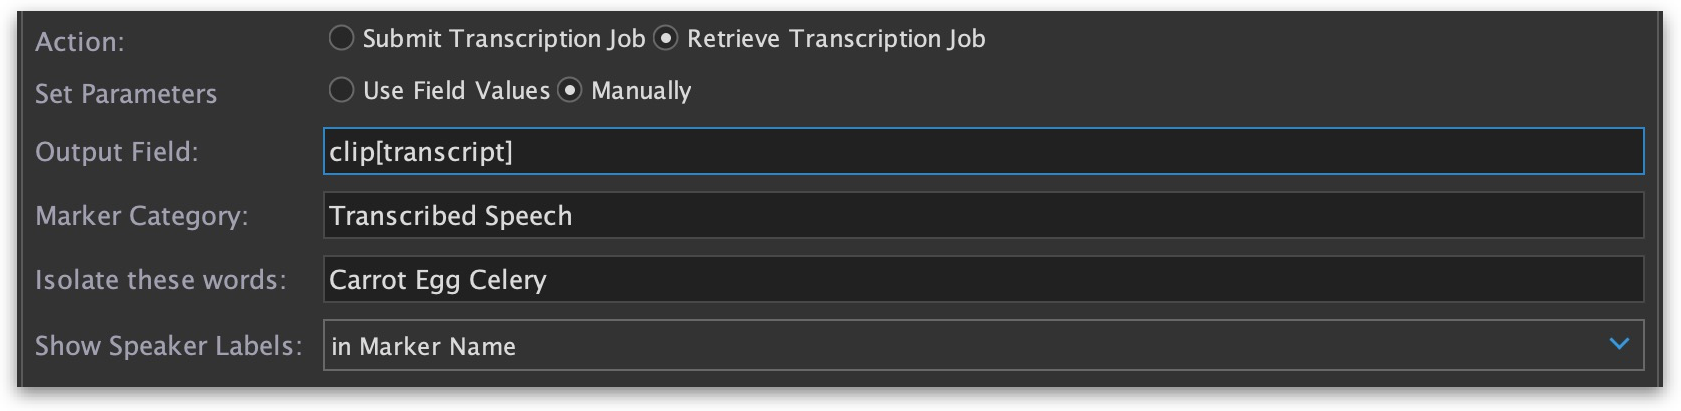
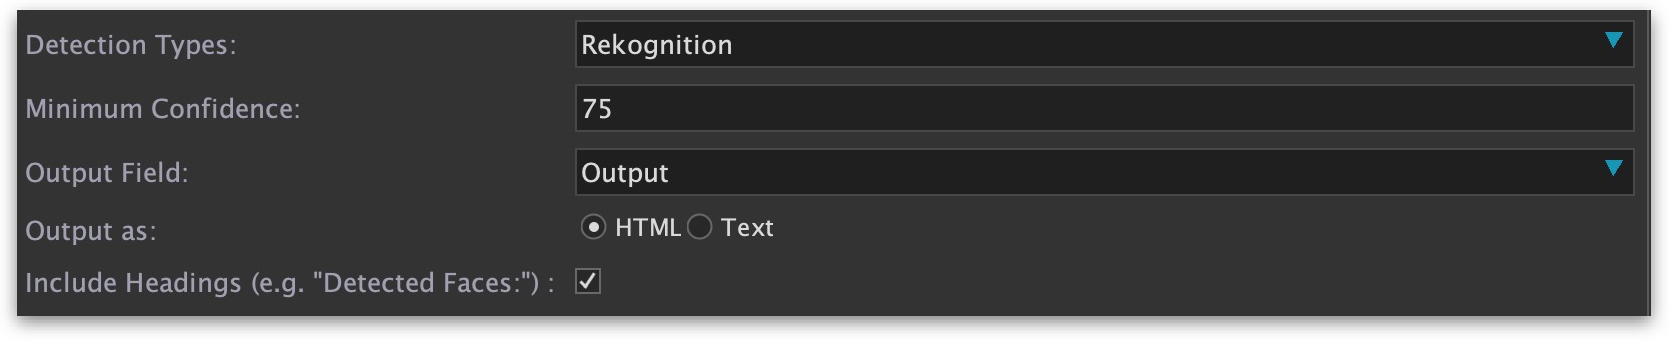
The created AmazonAI and AmazonAI Connector Fields are being populated in the the panel to be displayed on the CatDV client UI (sample below):
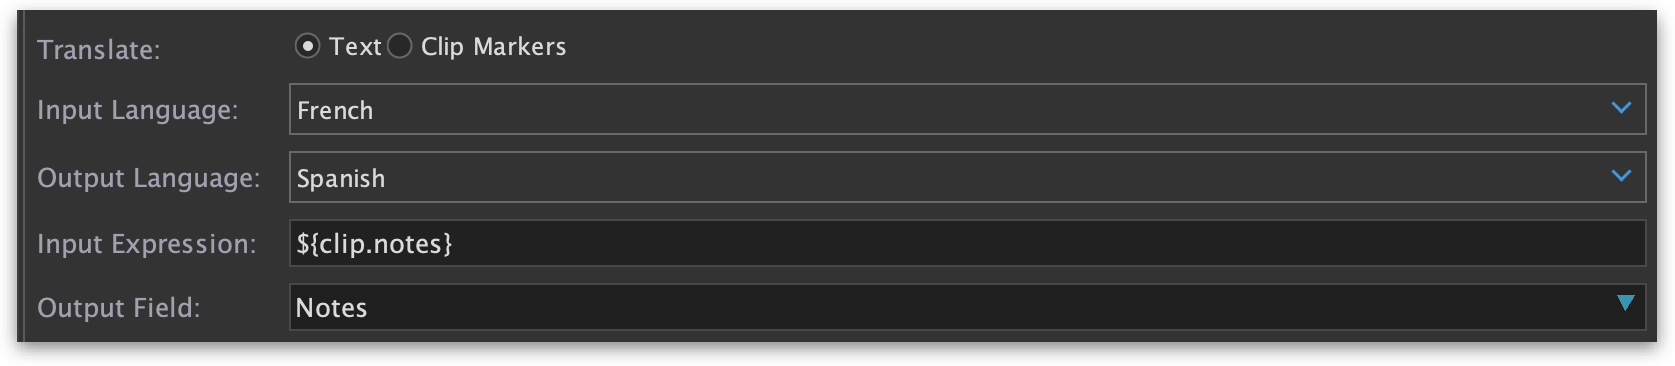 On the client UI, this will be how it appears:
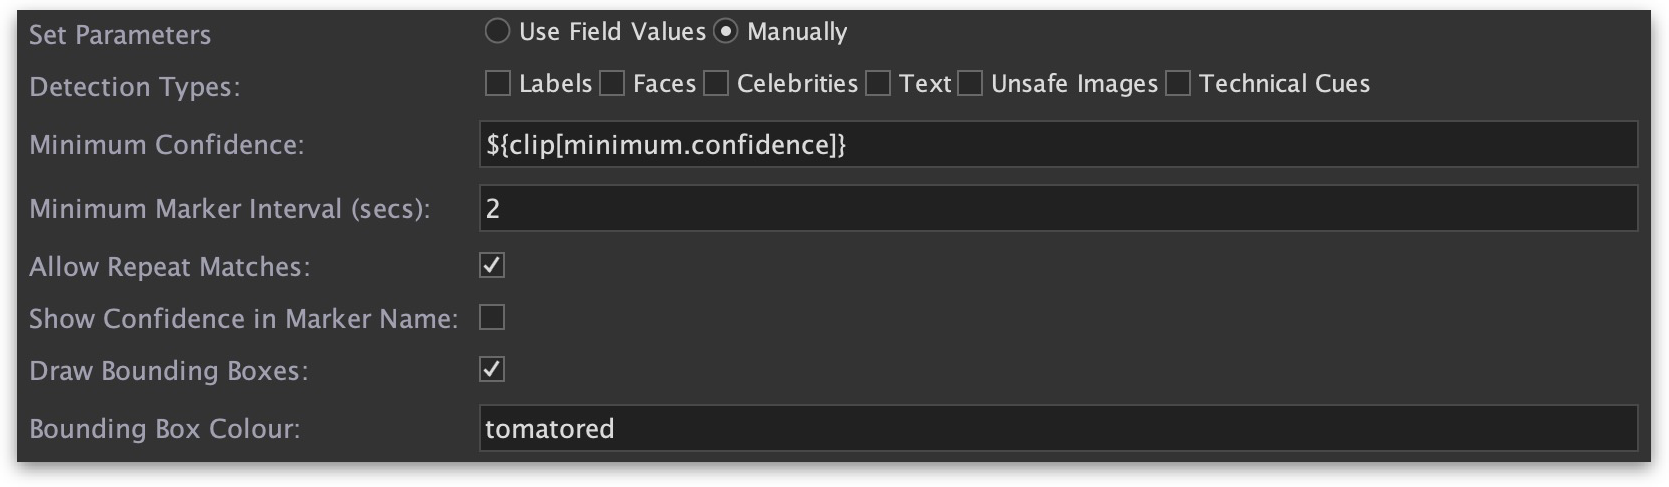
Set visibility rules or move the panels from the amazonAI panel-set to appropriate panel-set/visibility settings like in example below:
AWS Configuration
An S3 bucket with read-write permissions.
An IAM user with access to AWS’s AI services (e.g. rekognition, transcribe, translate)
What you’ll want to do is go to the IAM, create a user and under the permissions, create an inline policy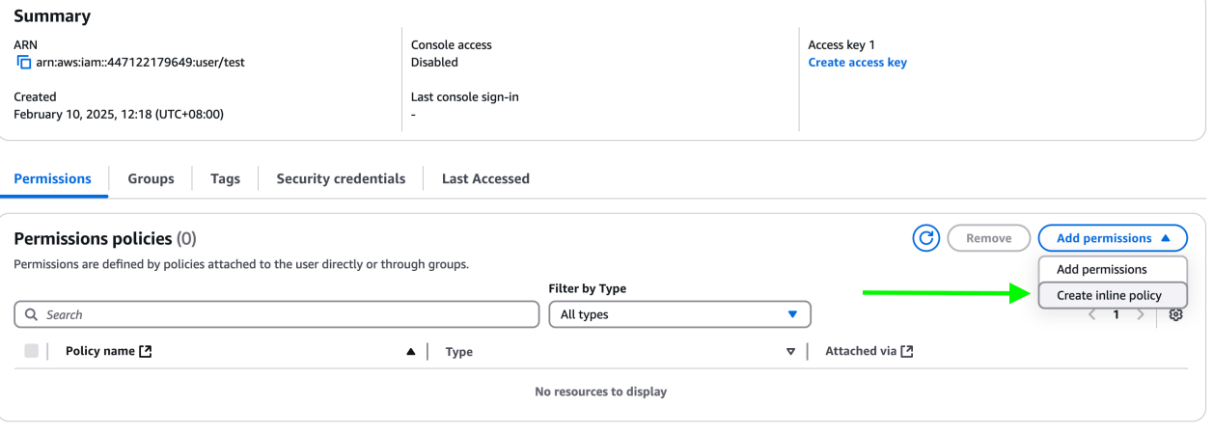
Switch from “Visual” to “JSON” and paste the following JSON (remember to change the “name-of-bucket” to your own bucket name. This policy declares all services under one.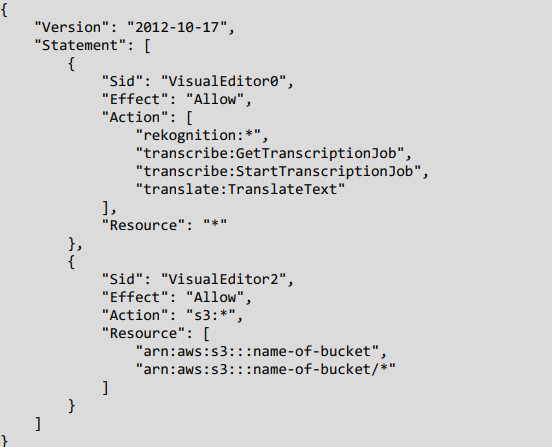
If you would like to separate different IAM users for different AWS AI services, you can declare them as such:
Sample of AWS permission policy for Transcription only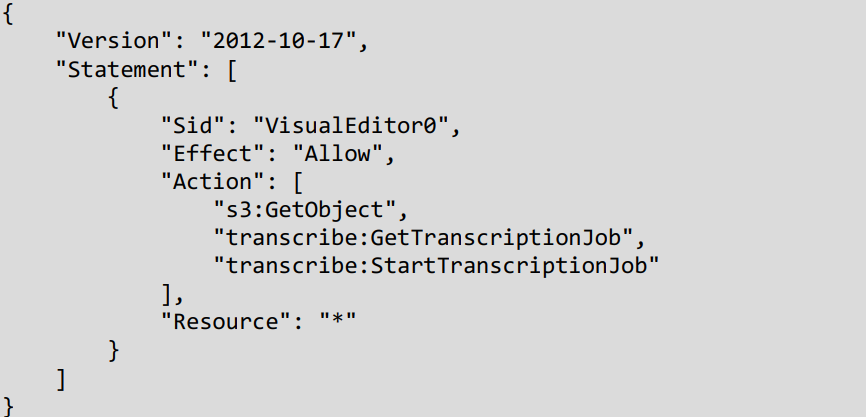
Sample of AWS permission policy for Translate only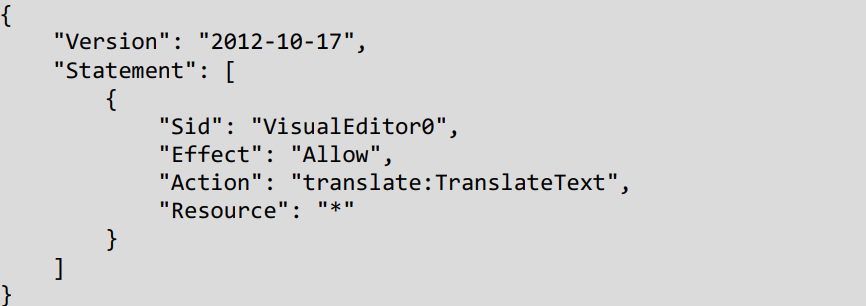
Sample of AWS permission policy for Rekognition only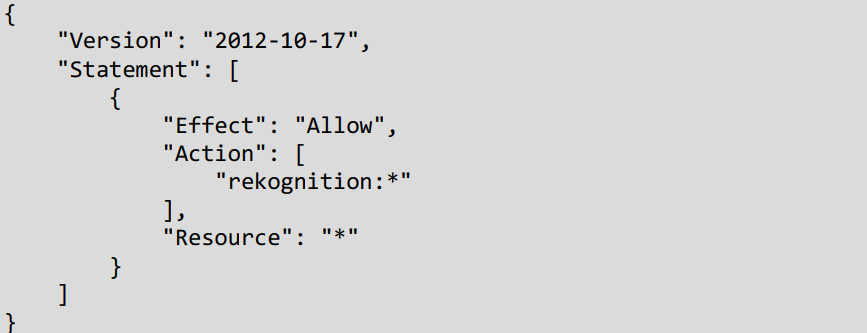
Worker Configuration
The plugin is installed by dragging ‘AmazonAI.catdv’ onto the Worker Node or placing it in the Worker Extensions folder.
Windows: C:\ProgramData\Square Box\Extensions
MacOS: /Library/Application Support/Square Box/Extensions
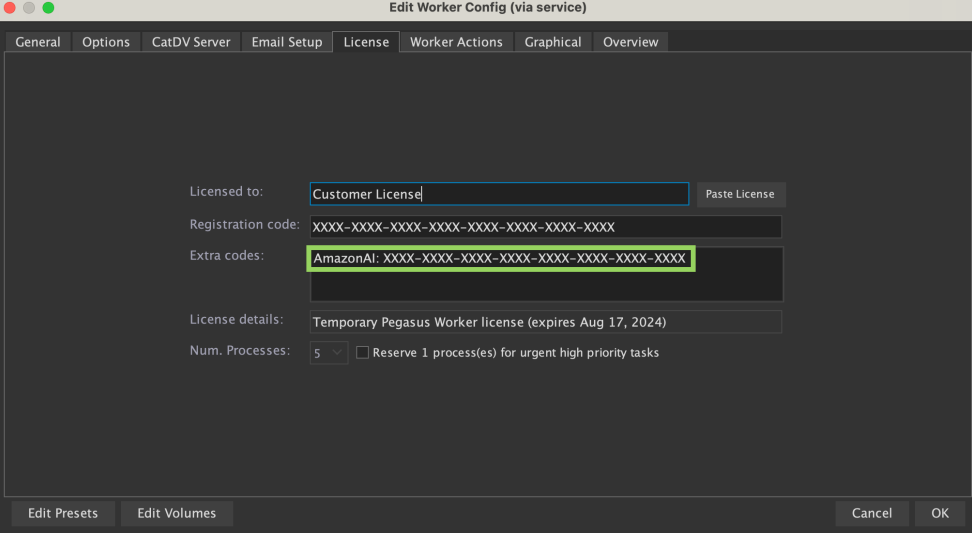
Remember to license the CatDV AmazonAI plugin.